Using Web Captioner With vMix


In a previous post, we talked about Web Captioner basics and briefly described what Web Captioner is and how to use it.
So a lot of our readers have begun to look into Web Captioner since our last post and many users have been asking questions about Web Captioner’s vMix integration. We have compiled a quick tutorial showing how to utilize this amazing feature!
Web Captioner vMix Setup
First go to the Web Captioner> Settings> Channels > vMix page.
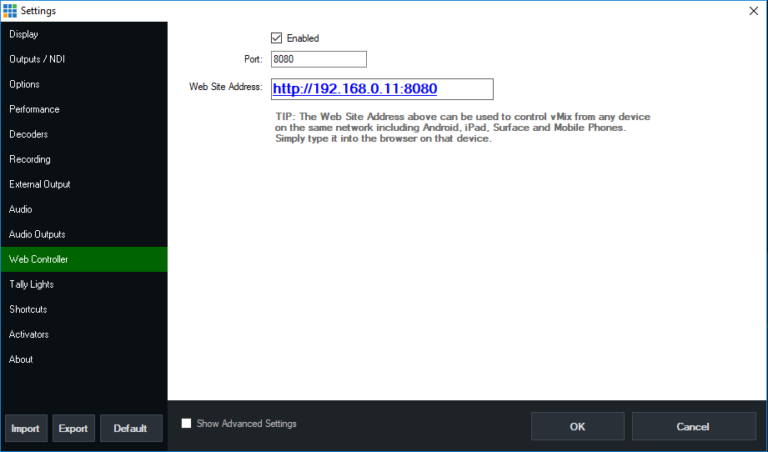
Next, copy the vMix Web Controller URL found in vMix at Settings> Web Controller> Web Site Address and paste it into the text field back in Web Captioner.
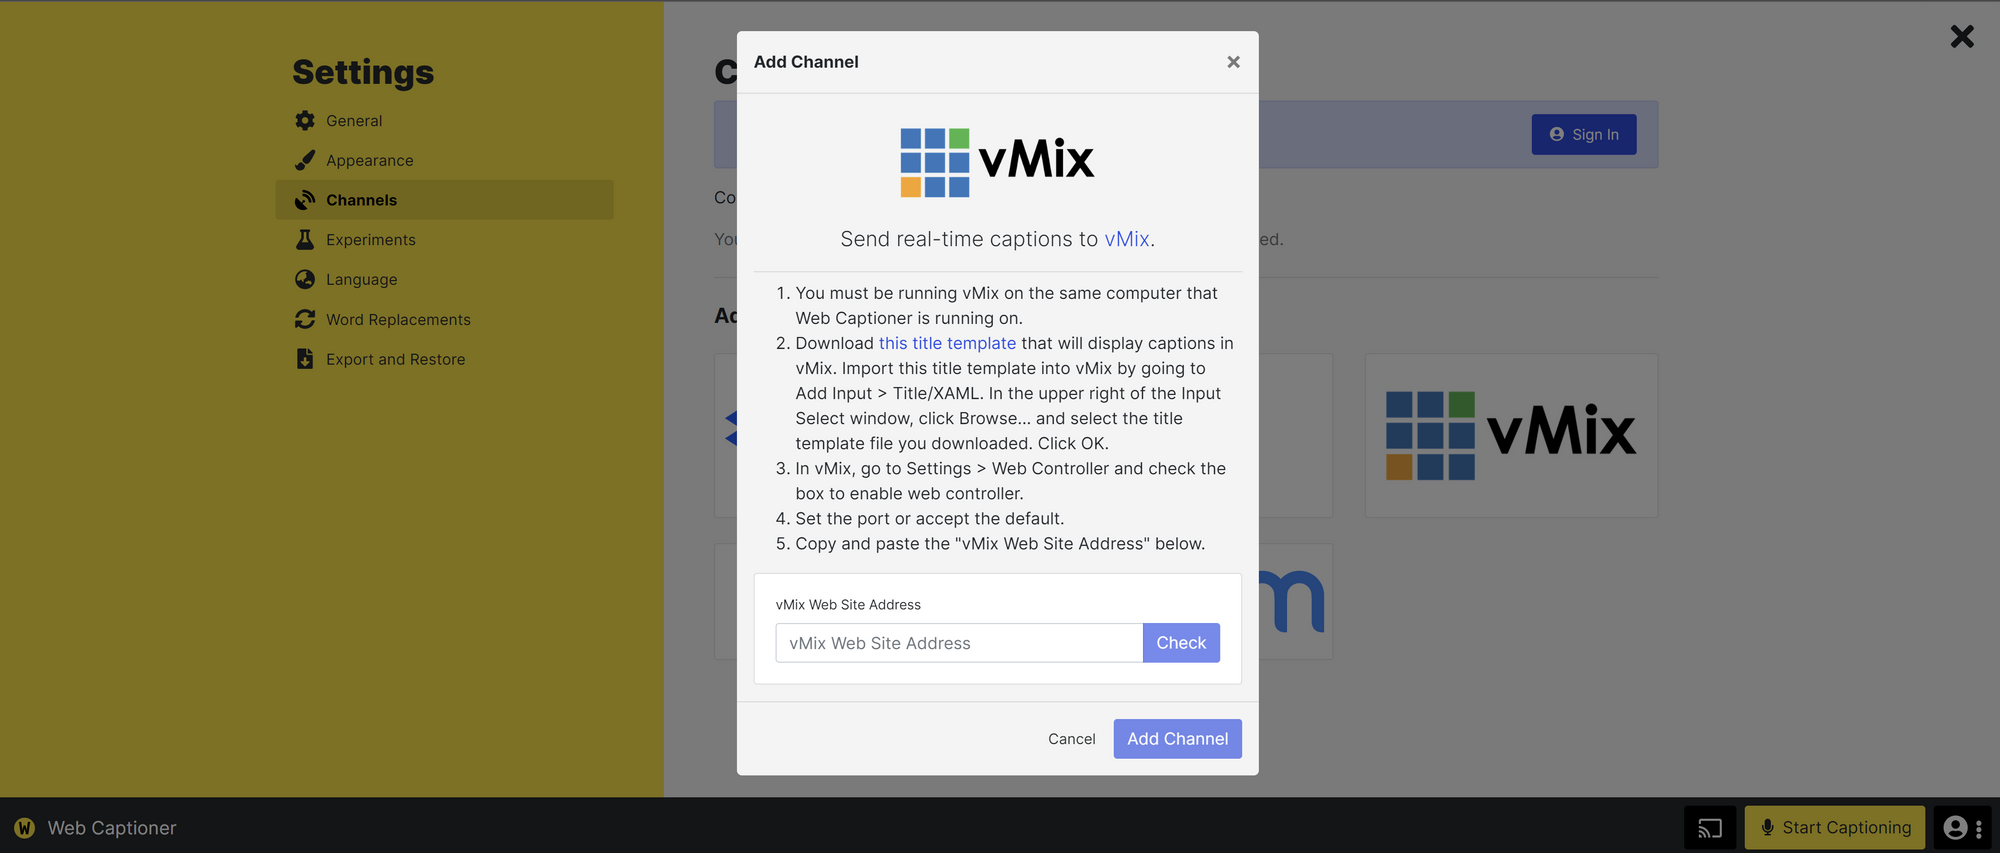
After clicking "Check" your connection will be validated. Click “Download this title template” for vMix.
Once that is complete, go back to vMix and go to Add Input > Title/XAML> Input Select> Browse.
Then, open the Web Captioner title template you downloaded. The title will then appear in the Recent tab of the Add Input> Title/XAML.
Double-click it. In the Title Editor that appears, optionally customize font and text size. Close when you are finished.

Once complete, go back to Web Captioner and finish setup. When you are ready to start sending captions, click Start Captioning on the main Web Captioner page. Poof! It works!
For a more in-depth tutorial and tips for troubleshooting visit the official Web Captioner documentation.